Metal Inlay
Inlay Adventures – Part One
If you’re anything like me you enjoy trying new creative techniques. It’s fun and very much part of the creative process, but can also be frustrating and time consuming.
Recently I’ve been taking time to explore new techniques in more detail before diving in to make a finished product. This is proving a great way to experiment and learn a skill with minimal risk and it’s much less daunting. An easy way to learn by my mistakes and build on my failures. To see what works and what doesn’t, what I like and what I’m not so keen on.
Rather than keeping this all to myself I thought I’d write my notes as blog posts on the off chance that you might be interested. Maybe you’d like to try the techniques too, or perhaps you’re just interested to see a glimpse of what goes on behind the scenes.
These are not designed to be detailed notes, nor will I promise lots of pretty pictures, just an outline of what I’ve been working on and my findings. I hope they will be of some interest to you.
This first post is about my initial ventures into metal inlay. The process of inlaying one piece of metal into another by mechanical means (no soldering required).
Here goes …

Purpose
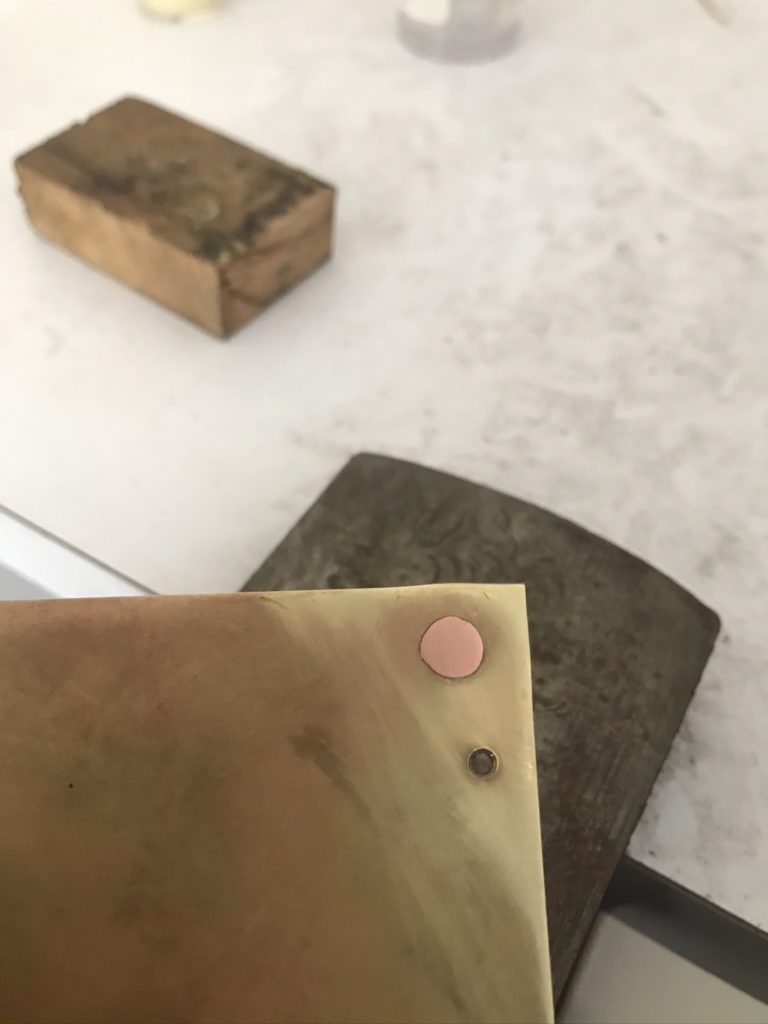
To learn the basic skills of metal inlay by inlaying a piece of round copper wire into a brass sheet.
Materials
2mm thick Brass sheet
3mm round Copper wire
The Theory
- Anneal both the brass sheet and the copper wire. Quench and pickle. This will make the sheet easier to drill and the wire easier to inlay.
- Use cone burrs to cut a hole in the brass sheet, which is exactly the same diameter as the copper wire.
- Make an undercut in the inside wall of the hole using a small cutting burr. It’s worth practicing on the side of the sheet first to check your technique.
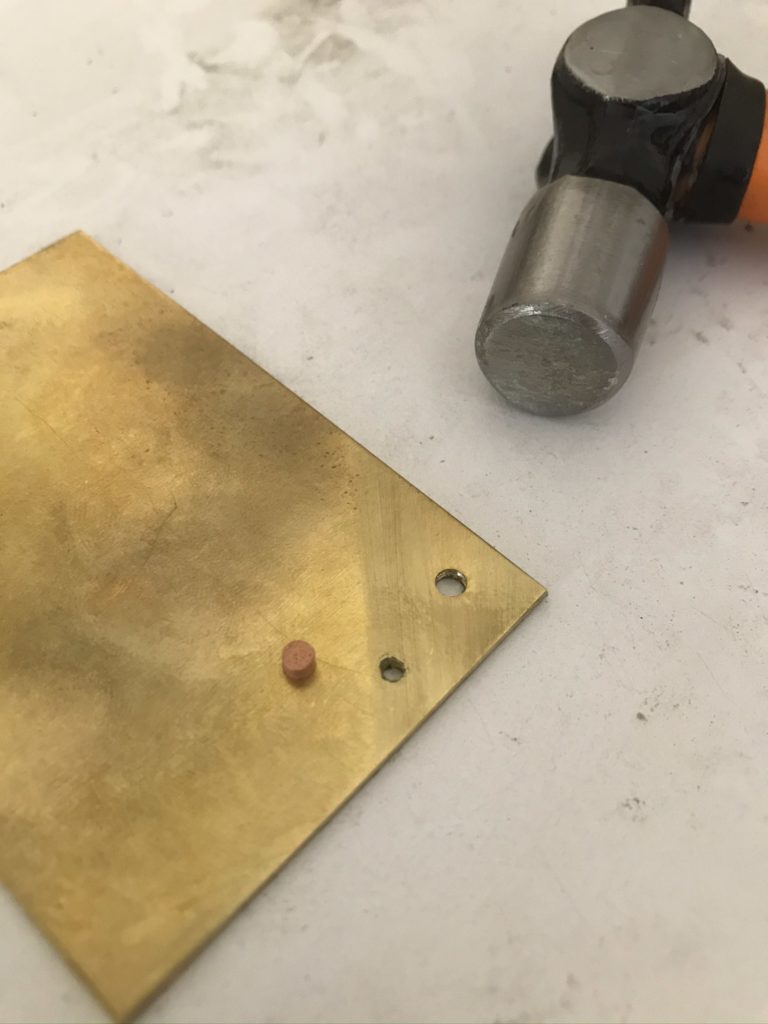
- Cut a length of copper wire a fraction longer than the thickness of the brass sheet – suggest approx. 3.5 mm long. Don’t be tempted to make it too long or you will end up with the copper flattening over the top of the sheet rather than hammering into it and you will give yourself a lot of cleanup work to do.
- Put the wire into the hole, with a small amount of overlap at each end.
- Use a hammer to gradually tap the wire into place. Alternating ends (like you would for a rivet). As the wire is softer than the plate, the wire will move into the undercuts in the hole. This is what will keep the inlay in place.
- File and emery the surface to remove any excess metal.
Findings
This process is not as straightforward as it sounds!
The hole and the inlay need to be exactly the same size. Too small a hole and the inlay won’t fit. Too big a hole and there will be a gap between the two metals.
Next Steps
Having successfully inlayed a piece of round wire, I’d now like to investigate:
Cutting a line in a sheet and inlaying wire lengthways along the line.
Cutting a hole just half way through the base sheet.
Doming the base sheet, then cutting a round hole and inlaying round wire.
Cut a design by etching using nitric acid.
Transferring a simple printed design onto the base sheet using acetone. Then cutting this out and adding a corresponding inlay.
Sweat Soldering the inlay piece onto the base sheet, then rolling it through a rolling mill. Thoughts are this will distort the shape of the inlay pattern, but worth investigating.
Try different metal combinations:
Fine silver into brass
Fine gold into sterling silver
Copper into sterling silver
Clearly more experiments to come. Watch this space …